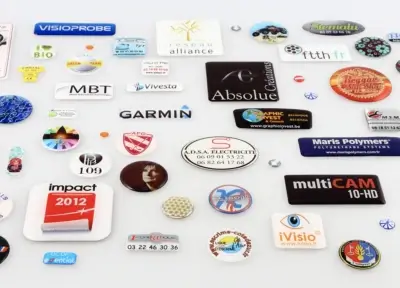
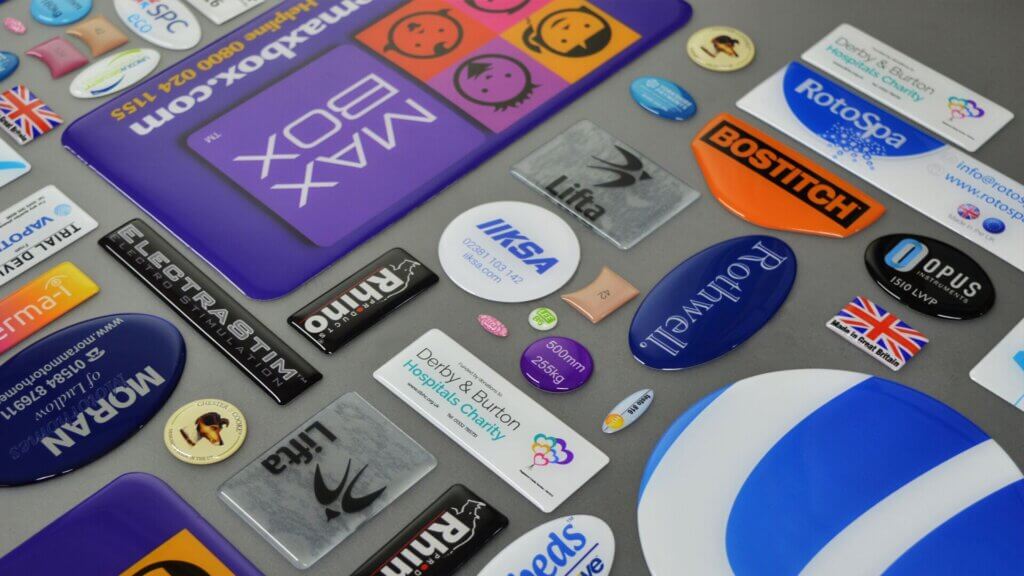
You might wonder what makes 3D stickers so captivating. The answer lies in the magic of a Doming Machine. This specialized equipment applies a domed resin finish to labels, transforming them into eye-catching 3D creations. By using precise resin application, doming machines create a crystal-clear, durable layer that not only enhances the aesthetic appeal but also adds longevity to the stickers. Whether used for branding or product labeling, 3D stickers created with a doming machine stand out in any setting, providing a premium look and feel.
Understanding Doming Machines
What is a Doming Machine?
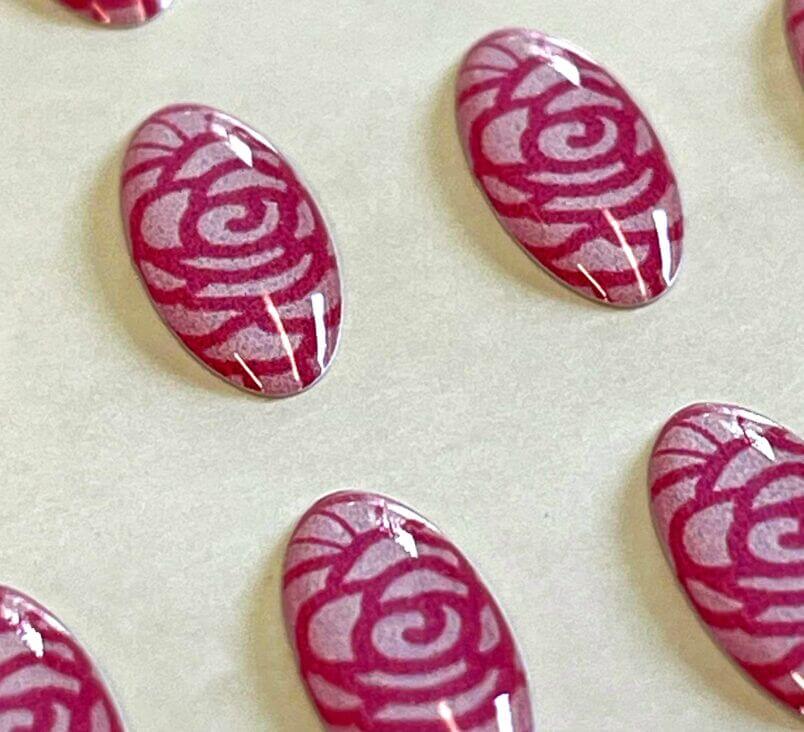
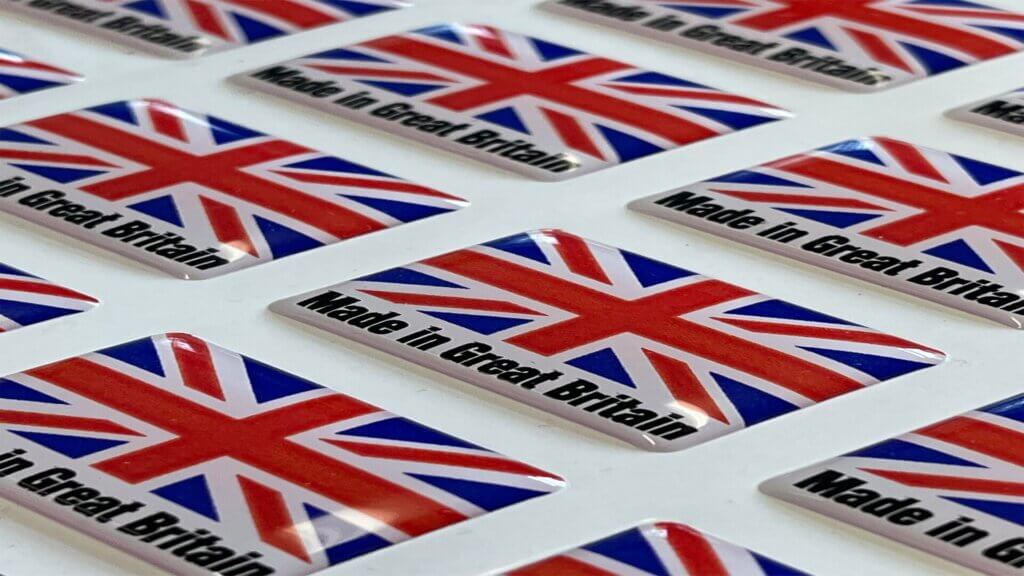
A Doming Machine is a sophisticated tool designed specifically to apply a dome-shaped layer of polyurethane resin onto labels, decals, or stickers, resulting in a raised, 3D effect. This process transforms flat stickers into visually striking, glossy products that capture light and attention. Doming machines dispense liquid resin, which then flows over the sticker’s surface, creating a smooth, high-gloss dome that hardens upon curing. The result is a thick, transparent layer that magnifies the underlying image or text, giving it a more professional and polished appearance.
The resin not only provides a stunning 3D effect but also offers protection against environmental elements such as moisture, UV rays, and abrasion. This makes stickers more durable, extending their lifespan while maintaining their vibrant colors and details.
Types of Doming Machines
Doming machines come in two primary types: manual and automatic, catering to different production scales and needs:
- Manual Doming Machines: These machines are ideal for smaller operations or custom projects, where a more hands-on approach is needed. The operator manually controls the resin dispensing, making it possible to work with smaller quantities or more intricate designs. This type of machine offers flexibility for lower production volumes, making it suitable for boutique sticker makers or small businesses that prioritize customization.
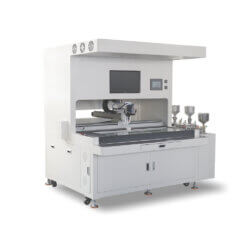
- Automatic Doming Machines: Designed for larger-scale production, automatic machines excel in speed, precision, and consistency. They use programmed controls to dispense resin with high accuracy, ensuring even distribution across large batches of stickers. This type of machine is often utilized in industries like automotive, electronics, and retail, where mass production of high-quality stickers is necessary. Automatic doming machines also minimize the risk of human error, which can occur in manual processes, ensuring a uniform finish across all products.
Potting Machine

Potting Machine
Importance of Doming in Sticker Production: Aesthetic Appeal, Durability, and Protection
The doming process significantly elevates the visual appeal of stickers, transforming them into high-quality, attention-grabbing products. Doming Machines apply a crystal-clear, high-gloss resin finish that immediately draws the eye, creating a striking 3D effect. This glossy layer not only enhances the appearance but also adds depth, making colors appear more vibrant and designs more prominent. This enhanced visual quality boosts the perceived value of the stickers, making them more appealing to consumers. Whether used for product labels, promotional materials, or as decorative elements, 3D stickers convey a sense of precision, craftsmanship, and premium quality. This plays a crucial role in enhancing a brand’s image and providing a more engaging consumer experience.

Beyond aesthetics, stickers produced using a doming machine are incredibly durable. The resin dome serves as a robust protective layer, shielding the sticker from external damage such as scratches, moisture, and harmful UV rays. This protective barrier ensures that the stickers retain their clarity and brightness over time, even when exposed to harsh or demanding environments. By incorporating a doming machine into production, manufacturers not only create visually stunning products but also ensure their longevity, giving customers a product that looks great and lasts. This durability enhances the sticker’s long-term value, making it ideal for various industries, from retail to automotive, where both appearance and endurance are critical.
Materials and Equipment Needed
Essential Materials
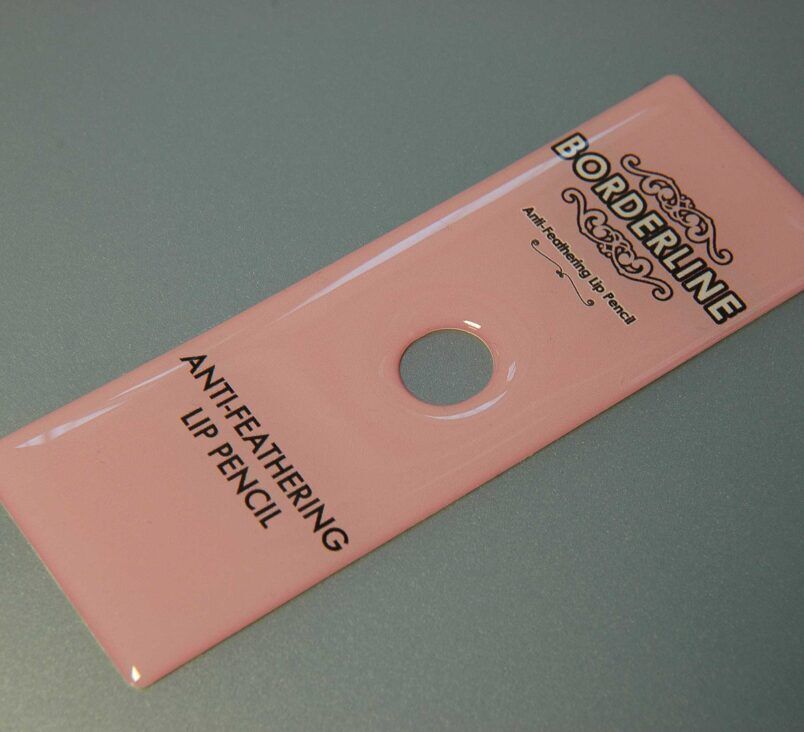
Printed Stickers: Before starting the doming process, it’s essential to prepare printed stickers that have already been die-cut to the required shape. However, it is critical that the surface of the stickers does not have a smooth laminated coating, as this can cause the domed resin to peel off. The material used for the stickers should have a texture or finish that allows the resin to adhere properly, ensuring a durable bond between the sticker and the resin layer. This is a crucial step in preventing issues with resin detachment and ensuring long-lasting 3D effects.

Types of Resins: The most critical material in the doming process is polyurethane resin, known for its versatility and superior performance. Polyurethane resin forms a thick, transparent layer over the sticker, typically up to 4mm in height, which gives the stickers their signature 3D look. This resin is favored for its clarity, flexibility, and durability, resisting UV-induced yellowing and maintaining long-lasting vibrancy. Its toughness makes it an ideal choice for outdoor and industrial applications where stickers are exposed to harsh conditions like sunlight, moisture, or wear.(Silicone glue, while less commonly used than PU resin, offers certain advantages in specific applications. It provides a similar domed effect but with enhanced flexibility and heat resistance, making it particularly useful for high-temperature environments or surfaces prone to expansion and contraction.)
Adhesive Backings: High-quality adhesive backings are essential for ensuring that your stickers adhere securely to various surfaces. A reliable adhesive will offer strong, long-term bonding while allowing for clean removal without leaving residue, making it suitable for multiple uses and surface types.
Equipment Overview
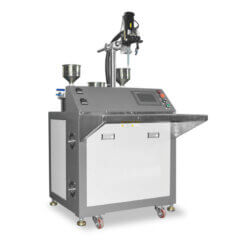
Doming Machines: The core of the entire doming process is the doming machine, which is responsible for accurately dispensing the resin onto the sticker surface. Available in both manual and automatic models, these machines cater to different scales of production. Manual doming machines are more suited for small-scale, custom projects, while automatic doming machines provide precision and speed for larger, industrial-scale operations. The machine’s ability to dispense the correct amount of resin without causing overflow or trapping air bubbles is key to achieving a flawless 3D effect.
Additional Tools and Accessories
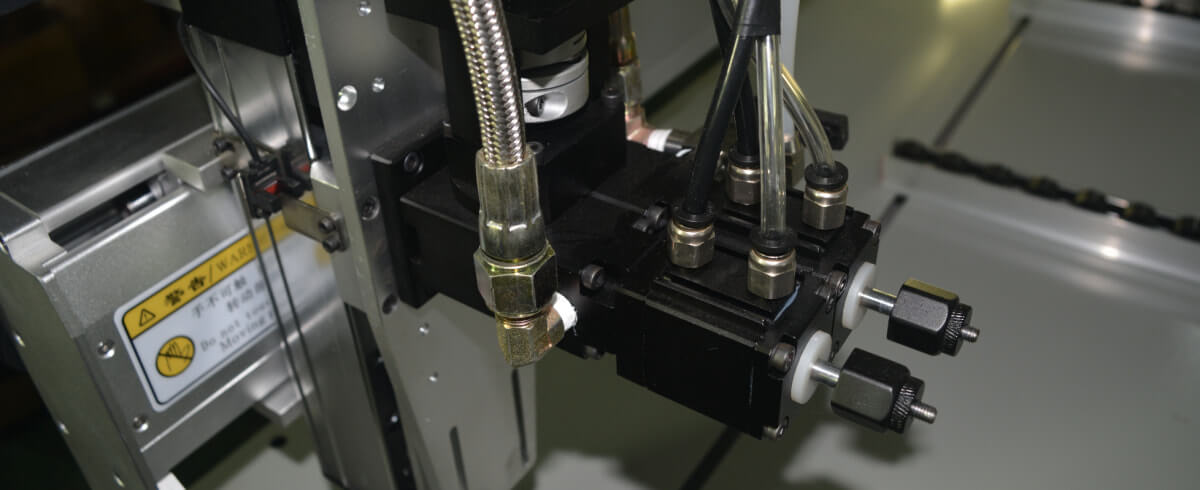
Glue Dispensing System: This system ensures precise control over the flow of resin, allowing for a smooth and even application across the sticker’s surface. A well-regulated dispensing system is essential for creating uniform domes, avoiding spills, and maintaining consistency in production.
Surface Tension Products: These are specialized materials that help manage how the resin interacts with different surfaces. By controlling surface tension, these products ensure that the resin spreads evenly, forming a perfect dome without irregularities. This is crucial for achieving a professional, high-quality finish on each sticker.
Step-by-Step Process of Using a Doming Machine
Preparation
Setting Up the Machine: Begin by placing your doming machine on a stable, level surface to prevent any vibrations or movement during the operation. Verify that all components, such as the resin dispenser and control panel, are properly connected. Adjust the machine’s settings according to the resin’s specific requirements, including temperature, flow rate, and dispensing pressure. Carefully follow the manufacturer’s guidelines for optimal performance. Proper setup ensures consistent resin flow and prevents mechanical issues during operation.
Preparing the Sticker Surface: Cleanliness is key for a successful doming process. Before applying the resin, ensure the stickers are entirely free from dust, grease, or any contaminants that could interfere with the resin’s adhesion. Use a microfiber cloth or a low-lint wipe for cleaning. Arrange the stickers on a flat surface, evenly spaced to allow uniform resin application. Make sure the stickers have no laminated coating, as this could cause resin detachment during curing.
Application
Applying the Resin: After ensuring the machine is correctly set, pour the polyurethane resin into the machine’s reservoir. Using the machine’s dispensing system, carefully apply the resin to the center of each sticker, allowing it to spread outward naturally. This method minimizes the formation of air bubbles, which can mar the final appearance. Adjust the flow rate to ensure precision, especially for intricate designs or smaller stickers.
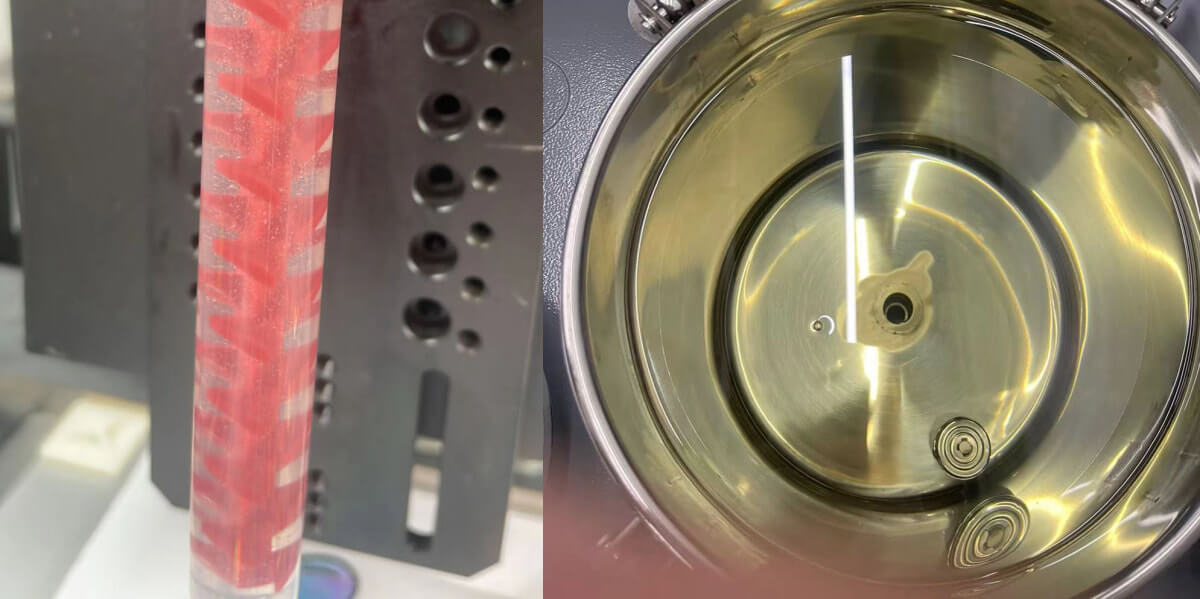
Eliminating Bubbles: During the application process, you may notice tiny bubbles forming in the resin. These bubbles can originate from the AB glue mixing device or directly from the glue tank. If you observe many bubbles in the resin, first check the mixing device to ensure it’s functioning properly. If the bubbles come from the glue tank, it’s important to vacuum the tank to remove them before proceeding. Ensuring a bubble-free resin is critical to achieving a flawless, professional finish.
Ensuring Even Coverage: Continuously monitor the resin application to prevent overflow or gaps. The resin should settle into a smooth dome over the sticker without spilling over the edges. If the resin isn’t spreading evenly, make minor adjustments to the machine’s settings or manually guide the resin with a small tool. Achieving even coverage is critical for both the appearance and the durability of the stickers.
Drying and Finishing
Curing Time: Once the resin is applied, allow it to cure naturally. Curing times can vary based on the resin formula and environmental conditions like humidity and temperature. Generally, the process takes a few hours, but in cooler environments, it may take longer. Keep the curing area clean and free from dust, as any particles can ruin the surface finish of the resin dome.
Final Touches: After the resin has fully cured, inspect each sticker for any imperfections, such as bubbles, uneven edges, or surface debris. If necessary, use a soft polishing cloth to lightly buff the surface and enhance its shine. Once finished, the stickers will have a professional-grade 3D effect, ready for use or sale, with a glossy, durable finish that will attract attention and stand the test of time.
Tips for Achieving the Best Results
Temperature and Humidity Considerations: The working environment plays a critical role in the doming process. Resin curing is highly sensitive to temperature and humidity, and improper conditions can lead to bubbles, incomplete curing, or uneven surfaces. For best results, maintain a consistent temperature of around 70°F (21°C) and keep humidity levels low. High humidity can cause moisture to get trapped in the resin, leading to bubbles or cloudiness. Consider using a dehumidifier if needed to ensure stable conditions.
Resin Mixing Techniques: Proper mixing of the resin and hardener is essential to achieving a smooth, bubble-free application. Follow the manufacturer’s instructions precisely regarding the correct ratio of resin to hardener. Stir slowly and steadily to avoid introducing air bubbles, which can later affect the final product. Also, it’s important to understand the differences between dynamic mixing and static mixing.
Conclusion
You have now explored the magic of doming machines and their transformative impact on 3D stickers. This process not only enhances the visual appeal but also boosts durability, creating a perception of quality and value. As a result, businesses often see increased profitability. The growing popularity of domed labels across industries highlights their effectiveness. Consider experimenting with doming to elevate your products. Whether you choose to do it yourself or outsource, the benefits are clear. Dive into the world of 3D stickers and watch your creations captivate and endure.